Offloading some thoughts

It’s been a mentally exhausting week. So shall offload here.

Received word just before I was sleeping on Tuesday that an acquaintance had passed on. He was younger than me, and we had so many mutual friends given the fact that we both played music and were from the same religious organisation.

I haven’t encountered a death of a friend who was this close to me. They are usually of people either older, or who I’d just known by sight – not someone who I had a photo with and communicated occasionally over the initial years.

The last message I had from this 小弟 was actually last year when he asked me about my Instagram handle.

A lot of us from the orchestra got to know him via his percussion teacher, who used to be my section senior. We all knew him from that big event, where everyone were in high spirits and we just took photos with many people including some local celebs. I still remember that few days clearly. He had a lot of things going for him and I always thought he would have a great future.

Rest in peace Jacob. Thanks for being the positive younger friend that so many of us had the chance to know.

When things like this happen, we can’t help to think why or what happened. I don’t know if it is due to age, or because I have a new focus now (motherhood), that I was able to easily discard these thoughts of “what happened” whenever they came.

Then was the other expectation that I have to trust people who had broken it because of their history. Unfortunately for this, I have to protect myself and my son, even if it comes from within family. The trust was broken when I was at one of my lowest, and this is not something that I can easily build back or convince myself that it is OK. In fact, it makes me even more anxious, knowing the cause of it.

I am after all human, and if anything, it is just a few months since the series of incidents and I have to take time to heal and come to terms with things too.

That’s all from my mental load this week.

Continue Reading

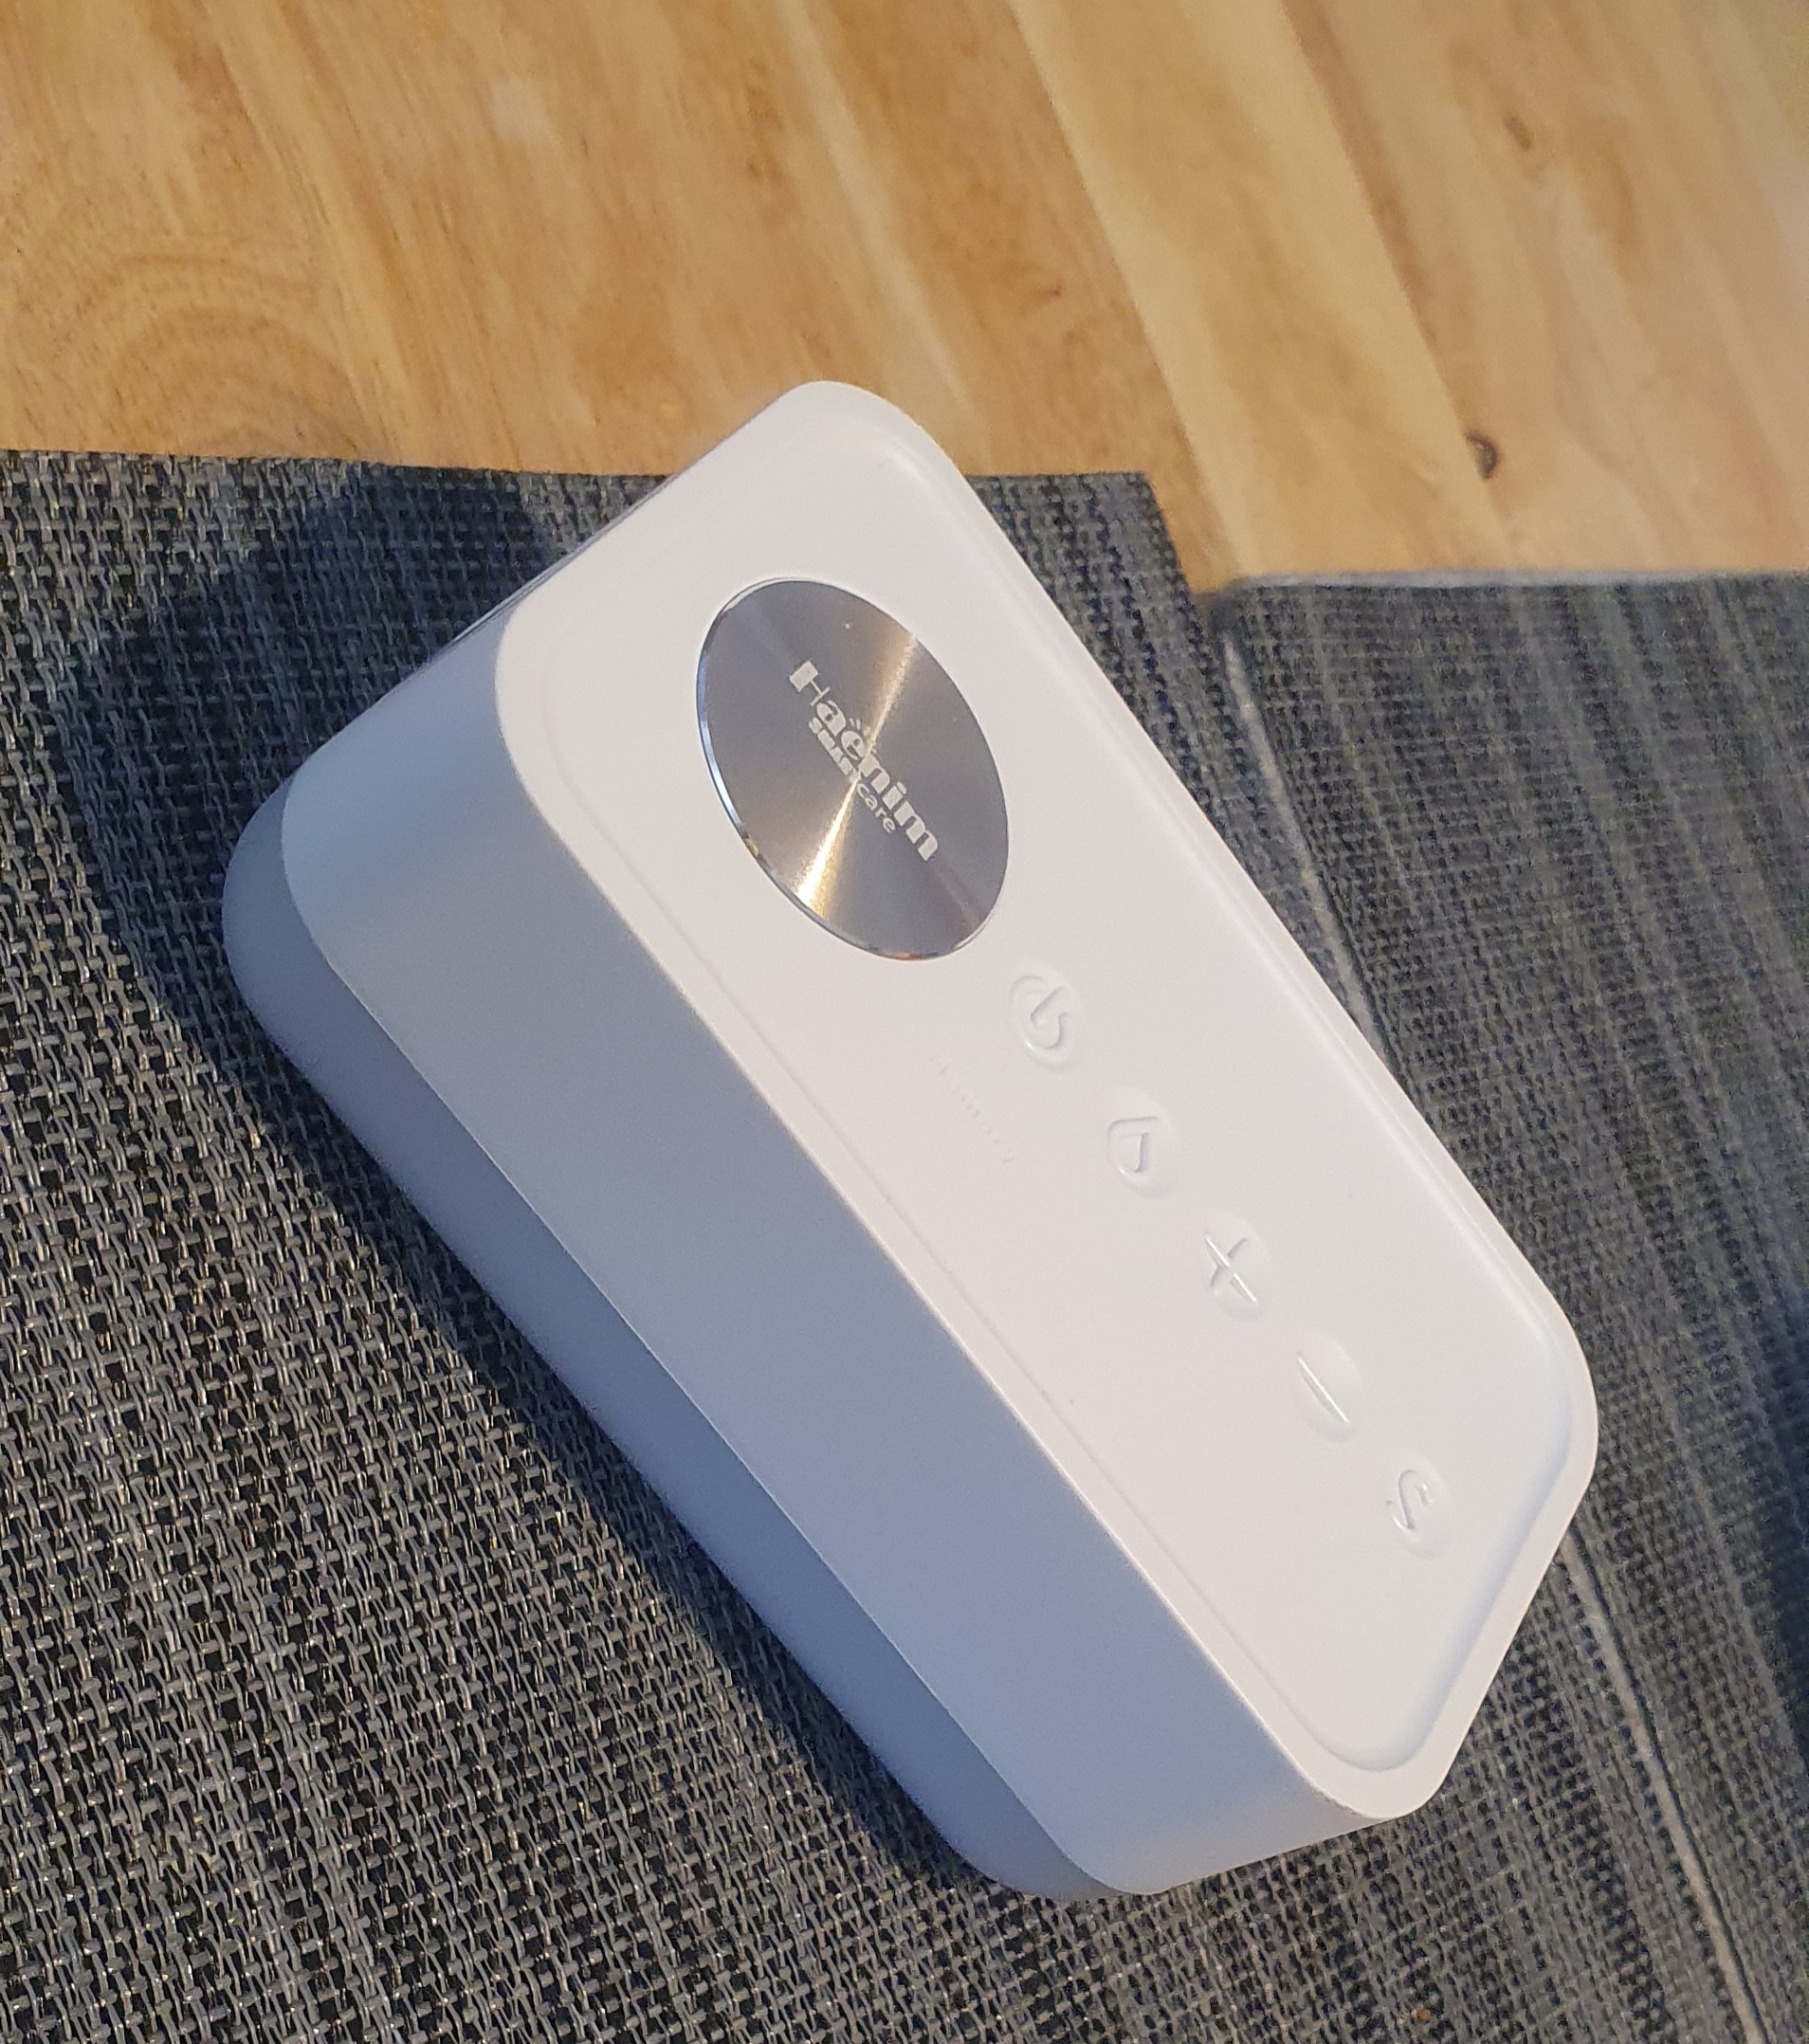
How to Choose a Breast Pump – A Haenim 7V Breast Pump Review

*Disclaimer: I am a Haenim 7V ambassador, however, the opinion below are all my own.


I bought my first breast pump in the middle of my pregnancy journey. Unfortunately, the thing about buying a pump when I had no clue what breast feeding or pumping is about, was quite difficult and I’d ended up choosing a pump that I felt wasn’t what I was looking for. This meant spending money on an item that I didn’t really want to use in the end.

I got the chance to use another pump recently, the brand new Haenim 7V. 4 months into my breastfeeding journey, I now know what I really needed and am looking for, hence decided to share my thoughts and views here for mummies researching on what pump to get and not waste their money on the pump.

Read on for a discount promo code!

1. Hospital Grade Pump

What is a hospital grade pump and why should I pick this?

This was the first thing that I’d thought of when I saw the phrase. My first pump was not a hospital grade pump and I suffered the consequences of it – plugged ducts. The milk did not clear well in my breasts which was a cause of plugged ducts. Plugged ducts are really painful and I would never wish it upon anyone else.

Having a hospital grade pump will ensure that the pump is strong enough to pump more efficiently (which means less time taken to clear your breasts of the milk) – you don’t want to spend too much time sitting there everyday pumping when you need more rest, or to spend more time with your baby.

The pump comes in 15 pumping levels and 5 speed cycles, which allows each of us to customise the settings to what we are comfortable with.

The Haenim 7V Breast Pump is a medical grade pump in South Korea, making it a hospital grade pump.

2. Memory Function

Breast pumps usually has 2 modes – the massage as well as the expression mode. The massage mode is used to stimulate a letdown of the milk (the initial flow of the milk) whereas the expression mode is a less quick mode that allows milk to continue flowing from the breast. Each of us has a different preference to how long we want each mode to last for, as well as the strength of the pump.

Here’s something that I don’t realise until I started working again – sometimes, we don’t keep staring at the breast pump machine and we forget to switch modes. Of course this might be OK to some mummies, but for me, it sometimes gets to me.

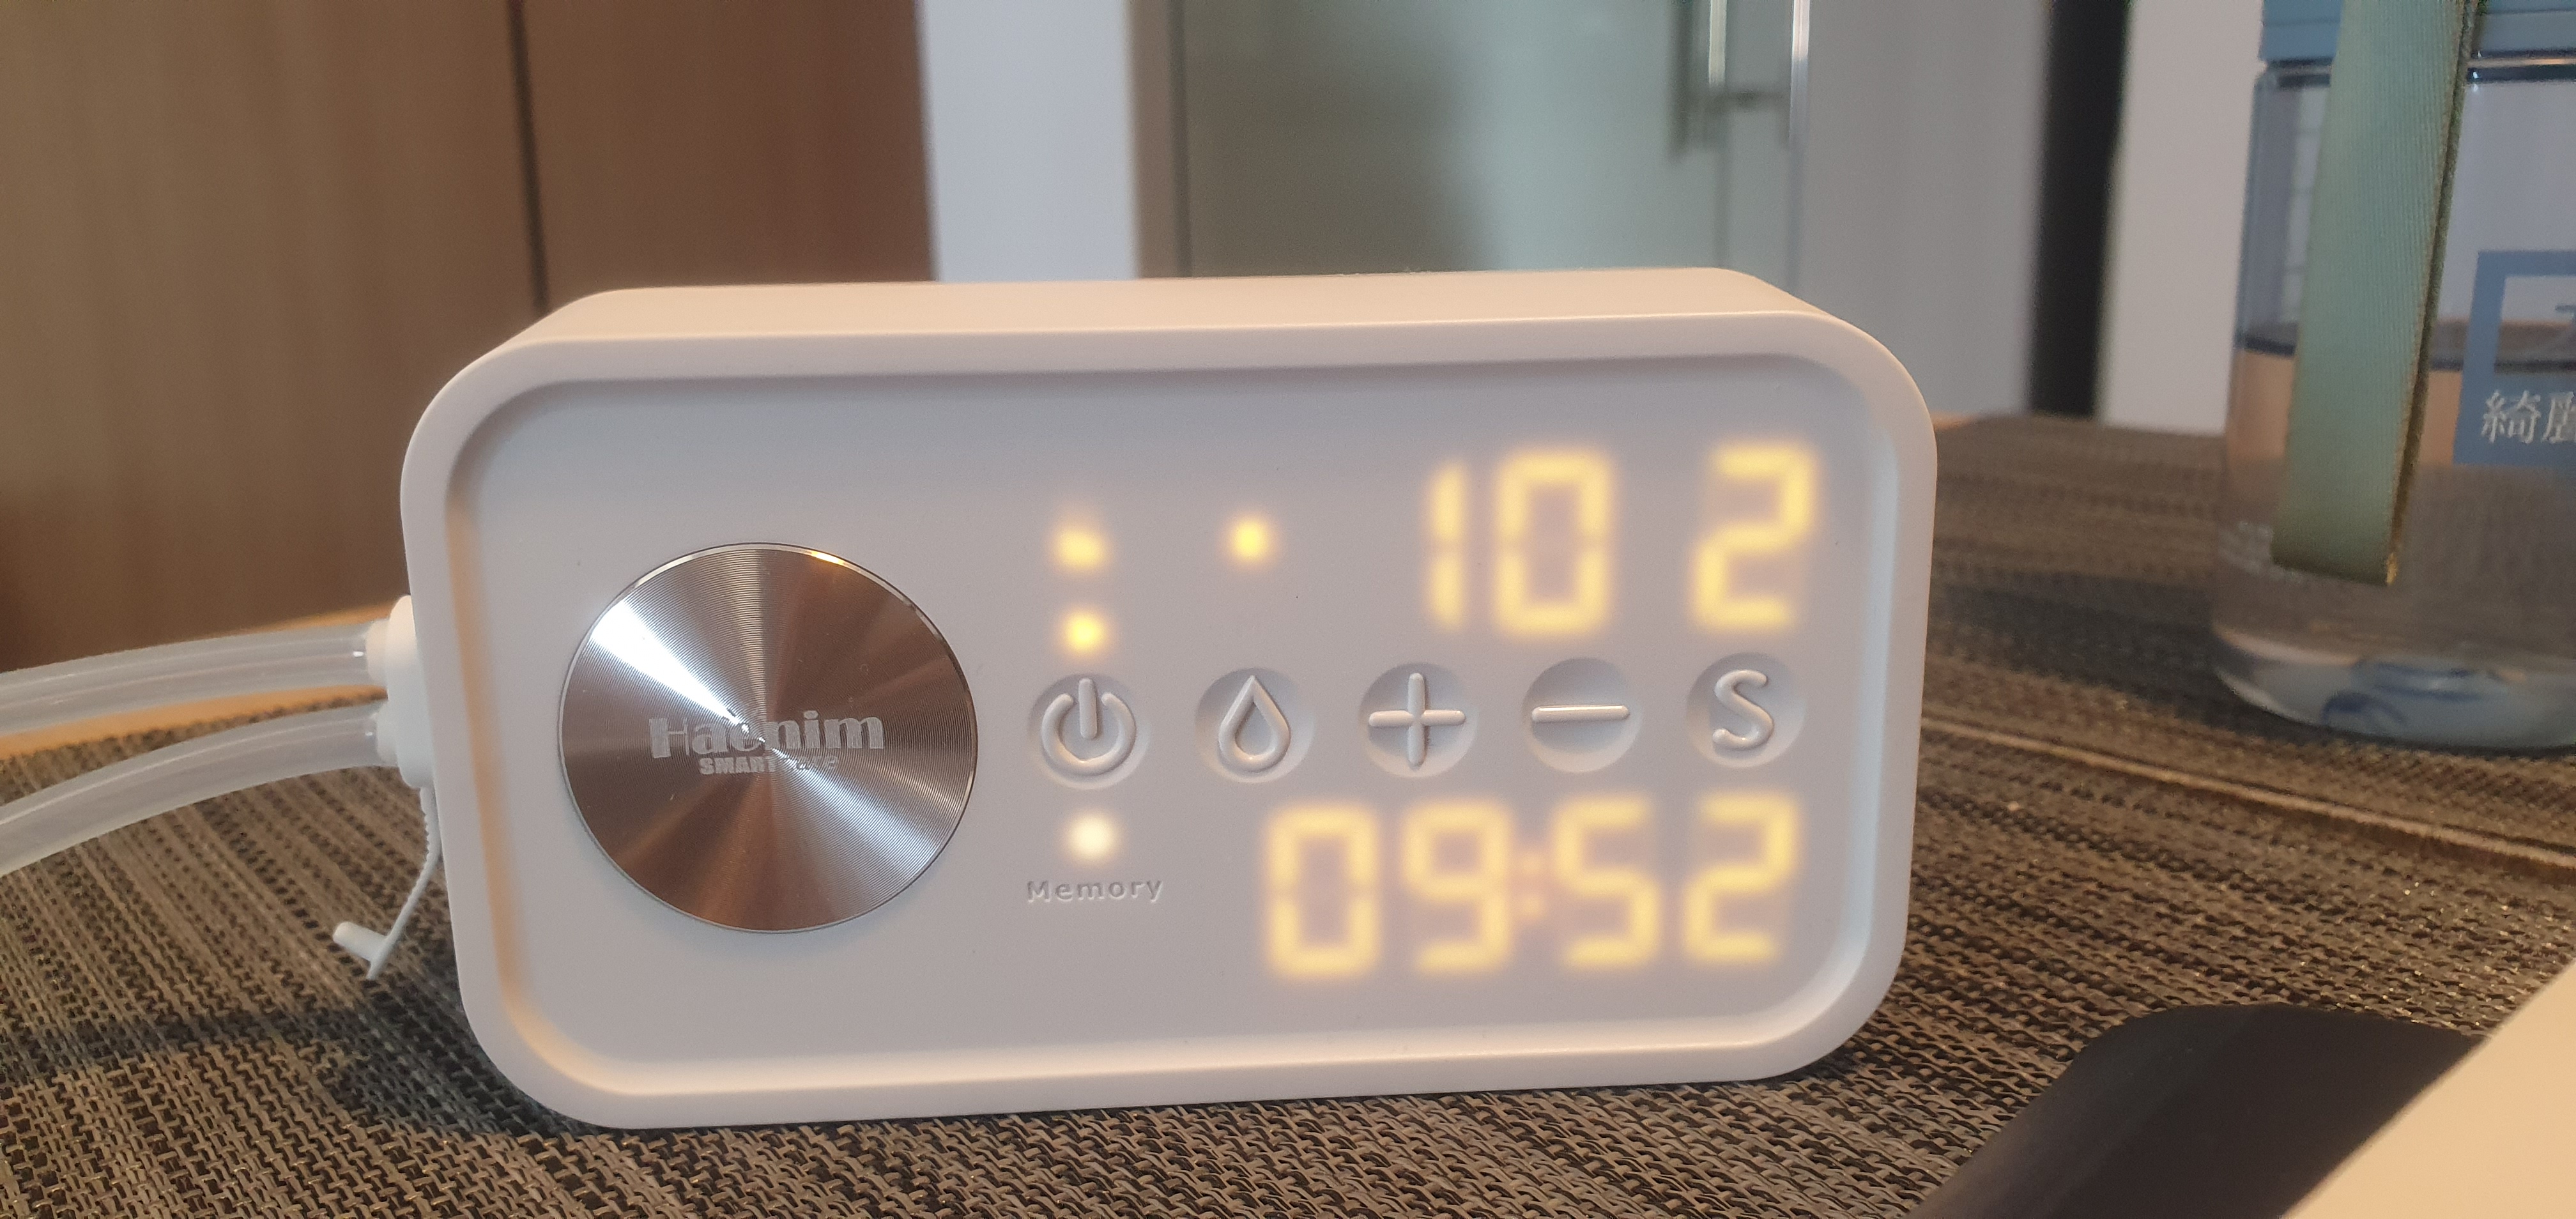
Having a memory function in the pump would solve this and allows me to set the pump to follow how long I want for each mode, the strength, and I can pump while doing my work or just resting.

This is one of the function that I was most excited about in my Haenim 7V! No need to keep staring at the pump when I’m pumping while working! It automatically switches mode and stops after the time is up!

3. Low Noise Output

I did not realise how important this is until I needed to pump in the middle of the night in the same room as my baby. This usually happens if he feeds on one breast and then fall asleep without feeding on the other breast. If the pump is too loud, you’ll risk waking your baby up and then you’ll have to put them back to sleep again. Therefore, it’s best to look for a quiet pump.

When comparing the Haenim 7V pump with my previous pump, the volume of it is definitely quieter. The pump only produces under 45dB of noise, which makes it quieter than a refrigerator! I could pump without worrying about waking my baby up now.

4. Weight and Size

Most hospital grade pumps are chunky and heavy but not the Haenim 7V. It weighs only 385g! Not only that it is small enough to put in a pouch and place it in your bag.

5. Budget

Pump parts has to be changed every 3-6 months. It is important to get parts that are not expensive. Fortunately, the Haenim 7V Breast Pump is not only affordable, the parts are not expensive too!

Read on for a discount code!

6. Other features

This breast pump is newly launched and other than the above features, it also features a night-light for the middle-of-the-night pumps, the new NexusFit Breast Shields, and even a manual pump (in case you forget to charge your pump but need to pump urgently).

The pump comes in white or black with huge nice LED numbers for easy viewing of numbers too!

Bonus: It comes with a manual pump

The Haenim 7V Breast Pump comes with a manual pump! I’ve always wanted a manual pump as I’ve imagined it to be easier than hand expressing. Turns out it really is! The set that you get in Singapore comes with a manual pump that is light enough for you to just place it in your small bag.

In conclusion

As you can see, all these features can be found in a Haenim 7V!

Go ahead and get a Haenim 7V and try for yourself!

You may purchase it at TLO.com.sg and get an additional 20% discount as well when you key in “Galovesongs” as the promo code!

.

Continue Reading

7 Useful Items to Help You With Your Pregnancy Journey

At tthe start of the journey, I didn’t know that there were so many things that would be helpful in this pregnancy journey.

Of course, back in the olden days, mothers do not have access to these items and got along fine – this was something I struggled a lot with myself as well: whether I should buy these items or not.

In the end, I caved in, and of course, buy within your budget. Look for deals on various platforms: ShopBack -> Qoo10, Lazada, Shopee.

Here’s a list of 7 small but useful things that I’ve bought and used that really helped me with my pregnancy journey that I didn’t know prior to this.

*Note that the links here are not sponsored but some of them do provide me with a small referral fee as an affiliate link.

1. Bra Extender

One of the first things I wished I’d got was this! I outgrew my bras very quickly due to the increase in my chest size and couldn’t wear some of my bras. However, there were a few that had bigger cup sizes and I was able to still fit but the band was too tight! Instead of getting new bras (which were not cheap, and the size will keep expanding), I went ahead and got a few bra extenders instead. I got mine from the below from Qoo10 – you could get one or 2 and keep rotating them between the bras that you have.

[S$0.35](▼83%)★Buy 5 Free 1★Bra Extender/ Low Back Converter/Transparent Bra Strap/Bra Accessories

WWW.QOO10.SG

2. Maternity Underwear

One of the first things that I bought were maternity underwear. My underwear were getting tight on my lower tummy during early pregnancy and I was worried that it would affect my baby, hence I went ahead to get some maternity underwear after seeing some recommendations from mummies groups on Facebook. The below shop at Qoo10 has quite value-for-money stuff.

[S$1.20][MATERNITY EXPRESS]♥MATERNITY EXPRESS♥maternity underwear maternity panty seamless panties maternity pants buy5get1free

WWW.QOO10.SG

3. Maternity Bra

I decided to just buy maternity/nursing bras as this will allow me to wear for a longer period of time. I got mine from Envy Her that has quite comfy maternity/nursing bras, as well as Our Bralette Club (their Tiger Mum’s bralette is soooo comfy!!). Will also be buying from Maternity Express at Qoo10 as theirs are quite cheap if you are looking for more budget friendly options.

[S$3.99](▼94%)2019 BEST BRA SELLER♥MATERNITY EXPRESS♥♥♥seamless maternity nursing bra handsfree pump pumping bra♥

WWW.QOO10.SG

4. Essential Oil Kit for Pregnant Mums

I’ve bought a few of these Essential Oil Kits for my pregnant mum friends from Essentials for Q and when it was finally my turn, I got one for myself too! Especially at the beginning, I didn’t have morning sickness but standing on trains were just difficult. Especially when there wasn’t a visible bump yet, you probably wouldn’t get any seats. The nausea roller was a good help and I use the muscle relaxant for my post cramps. My first trimester made me feel very bloated as well, and the intake of carbs were something that I wasn’t used to (I didn’t really eat carbs pre-pregnancy). I used the tummy rub in this kit as well to help myself feel better.

5. Compression Socks

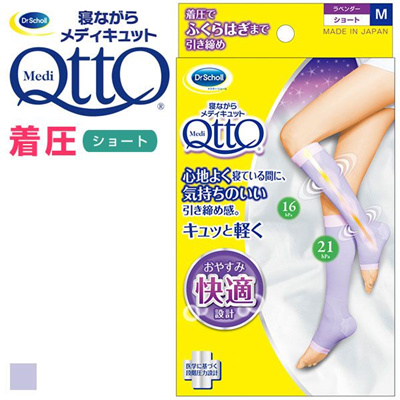
The leg cramps from 2nd trimester onwards were quite painful. Some friends have resorted to just going for massages (whether by their husband or prenatal massages) but the post-cramp muscle aches were just too terrible for me and I ended up caving in and buying a pair of compression socks. Also, pack this in your birth bag as some friends have told me that some hospitals would expect you to wear post-delivery as well. So far so good for me – I’ve heard that it doesn’t work for everyone.

[S$24.50](▼11%)Dr. Scholl ‘Medi Qtto Short Open Toe Compression Socks (For Sleeping Made in Japan)(A99600483)

WWW.QOO10.SG

6. Stretch Marks Reduction Oil

There are a few Stretch Marks Reduction Oil Brands around – I’m currently using the famous Bio Oil which my sister gave me, and also bought Palmer’s Stretch Mark Massage Oil that I’ll be using once Bio Oil is used up.

7. Extra pillow

You don’t really need to buy this if you have extra pillows at home. Just use this to put in between your legs when lying sideways in order to align your hips when you sleep sideways from 2nd trimester onwards!
Continue Reading

4 Nights in Busan – Day 3: Shinsegae Spa Land, Haeundae Beach, around Haeundae

Day 3: Shinsegae Spa Land, Haeundae Beach, around Haeundae

Shinsegae Spa Land
Address: 35, Centumnam-daero, Haeundae-gu, Busan

We didn’t plan much for day 3 other than the spa. Unfortunately Eugene wasn’t feeling too well in the morning so we decided that I would go for the spa/sauna alone while he waits for me in the mall (he ended up catching a movie). I was pretty worried that I might break any rules while in the spa so did a lot of googling the night before. I thought it’ll be helpful if I post some of my experience here to share with others who are worried as well.

We reached the Centum City mall a little earlier than 10am so it wasn’t open yet. It took us a while to find the entrance to the spa. Look for Exit 12 and walk all the way straight (see the map on this page for reference: https://www.koreatodo.com/shinsegae-centum-city-spa-land). We ended up asking the departmental store staff for help (one wasn’t particularly friendly oh well) and got to the entrance just fine.

Upon reaching the counter, you pay for your entry and the cashier will hand you a receipt with a number. This is the number that you need to remember. Upon entering, it will be a shoe locker area – head to your number, place your shoes inside the locker and remove the key at the locker. Then you use that key to enter the spa area.

Upon entering, head to the respective gender locker room. Again, look for your locker number and use that same key to open and lock your locker. Do note that in the locker room, there will be others who are changing or walking around in their birthday suits so don’t use any cameras for privacy.

After getting into your birthday suit (aka nude), and bring along your soap, shampoo, conditioner etc. For ladies, I headed to the “pool area” where the showers and scrubbing areas are at and look for an empty seat to sit and clean yourself.

After you are done washing up, you can head to the various hot spring pools to soak. There were about 6 of them and the outdoor ones but it was raining when I went so I wasn’t able to go to the outdoor pools.

After about 30minutes, I wore the given clothes and went to the mixed gender area. There were various hot rooms for you to enjoy and sweat it out!

My leg muscles were not so sore after that. Also tried the massage chair which made me relax after that.

As always, the “traditional” way to enjoy a Korean sauna is to buy sikhye (rice water) and eat boiled eggs!

Shinsegae Mall

After meeting up with Eugene, we had a quick meal at the foodcourt and tried their Jjajiangmyeon – a Korean version of the Chinese 炸酱面(zha jiang mian). I always thought that it would be salty but it was tasty! The sauce was made with a lot of mushrooms and I totally understood why people would eat it – I would too!

There were other stalls at the foodcourt and an ice skating rink if you would like to visit.

Haeundae Beach

We took the train back to Haeundae, and walked to the Haeundae Beach. There were various routes to the beach, but all in all it was about a 10mins walk from the Haeundae station.

It’s a big stretch of the beach and we had fun walking around and watching the locals play in the water.

There were floats provided as well which I thought was quite a nice touch!

Be sure to also take a picture by the “Haeundae” sign.

60계치킨 (60 Chicken)

We found this fried chicken place operated by non-locals by the street along the way back to our hotel. Their name is called “60 chickens” because they only sell 60 chickens everyday.

I wanted to mention it as it’s pretty good! Do check it out.

Busan Day 3 Places of Interests Address
Shinsegae Spa Land 52, Jagalchihaean-ro, Jung-gu, Busan
Haeundae Beach 203, Gamnae 2-ro, Saha-gu, Busan
60계치킨 (60 Chicken) 부산광역시 해운대구 중동 1393-61
Continue Reading

4 Nights in Busan – Day 2: KSGI Busan, Jagalchi Market (부산 자갈치시장), Busan Gamcheon Village, Songdo Beach Skywalk, BIFF + Kyochon

We covered quite a few places on the 2nd day in Busan! My calves and thighs were seriously screaming throughout the day (had also walked a lot in Seoul).

Day 2: KSGI Busan, Jagalchi Market (부산 자갈치시장), Busan Gamcheon Village, Songdo Beach Skywalk, BIFF + Kyochon

KSGI Busan Haeundae Hope Cultural Centre

Whenever I travel, I’ll try to see if I can pop-in a visit to the local Soka Gakkai centre. This time, our itinerary in Seoul was quite packed so I decided to just have a visit in Busan instead.

Of course, we brought the official letter from HQ over and had a quick visit! The staff and members were friendly – I don’t think many people from Singapore visit that kaikan – so they asked if they could have a picture with us.

I particularly liked their kids room next to the main meeting area for kids to hang out while their parents were attending a meeting!

Jagalchi Market (부산 자갈치시장)
Address: 52, Jagalchihaean-ro, Jung-gu, Busan
Opening hours: 5:00-22:00 (2nd floor restaurants from 9:00)
Closed on 1st & 3rd Tuesdays of the month.

This was a highlight for me. I terribly want to eat seafood in Busan as I’ve watched way too many videos on Youtube about how nice they are.

We don’t really know what to do – as we realised that in Busan, most people don’t speak English and my terrible Korean language knowledge was not going to get us anywhere. There was a buffet at the top floor of Jagalchi Market that we wanted to go but in the end Eugene said to just try the restaurants at level 2.

Luckily we did as the food there was cheaper (I felt) and with a variety. We ate at one of the first few eateries we saw and the staff kept trying to sell us the set as it was better. I was personally a bit unsure about it until the food came – it definitely was more value for money to order the set and we saw that the locals all had ordered the same set as ours (do what the locals do right?)

The food was delicious! And definitely worth the money that we paid. Pictures below to feast your eyes to.


Busan Gamcheon Village (부산 감천문화마을)
Address: 203, Gamnae 2-ro, Saha-gu, Busan
We then took a short bus ride to Busan Gamcheon Village which was situated on a hill! The hill is quite tall too so we had to basically walk almost vertically (ok it felt like it) upwards some steep roads all the way up in order to see the view. Friends who have been there had told me that it was a hike and they weren’t kidding.

You can purchase a map if you like at the visitor centre and collect stamps from various checkpoints along the village which was pretty fun.
Certain photo spots (like The Little Prince one) was very popular and there was a queue for it. We went to the one next to it where surprisingly not many people even noticed it.


The view from the top, however, is worth the hike.

We spent about 1.5 hours there.

Songdo Beach (송도해수욕장)
Address: 50, Songdohaebyeon-ro, Seo-gu, Busan
We took another short bus ride and a 15 mins walk from a bus terminal near Busan Gamcheon Village to Songdo Beach.

The highlight at Songdo Beach was the Skywalk, which allows you to walk out to the sea on a bridge.
There were loads of beach activities too – people were swimming, taking their mini electric boats out, and taking lots and lots of pictures. There were some statues that you could take pictures with.

You could also take a cable car (which we didn’t) to see the beach and travel from one side to the other.

BIFF Square (BIFF 광장 (구, PIFF 광장))
We took another quick bus ride (back to near Jagalchi Market) but this time walked to BIFF Square.
BIFF stands for Busan International Film Festival. I didn’t know that the BIFF Square was open all year round (I thought it only was there during the film festival) so it was quite nice to be there.

There were quite a lot of street food and stalls for you to shop and eat there.We aren’t really shoppers so we just had a look around and saw people drinking Gong Cha so decided to head to Gong Cha to see what the difference is between the Singapore bubble teas and Korean ones.

The menu was in Korean (I will definitely learn the words for “take away”, “order”, “payment” etc before I go back to Korea again) and my limited Korean (and Eugene’s app) only allowed us to figure out what the drinks were. We accidentally ordered bubble teas to drink at the cafe so we did.

Something we learnt in Seoul – if you are not taking out your order, the orders will be in reusable plates/cups. This is an environmentally friendly initiative I guess so try not to have takeouts wherever possible!

Kyochon Chicken
Special mention here!
6 years ago when I went to South Korea with my family (it was with a tour group), we got the chance to eat Kyochon fried chicken in Jeju. I’ve NEVER had such nice fried chicken before and even after trying different Korean fried chickens in Singapore, I’ve never found that taste again. Until when we went back to Korea I guess 😀

We ordered their half-and-half chicken, which came with pickled radish, and we bought some beer from the convenience store just at the first level of where we were staying. Chimaek 치맥 it is!

Busan Day 2 Places of Interests Address
Jagalchi Market (부산 자갈치시장) 52, Jagalchihaean-ro, Jung-gu, Busan
Busan Gamcheon Culture Village (부산 감천문화마을) 203, Gamnae 2-ro, Saha-gu, Busan
Songdo Beach (송도해수욕장) 50, Songdohaebyeon-ro, Seo-gu, Busan
BIFF Square (BIFF 광장 (구, PIFF 광장)) 4, Nampo-gil, Jung-gu, Busan
Continue Reading

4 Nights in Busan – Day 1: Harry Potter themed cafe, Bay 101, Gwangbokdong Food Street (광복동 먹자골목)

4 days in Busan? A lot of friends were quite surprised by our decision. While doing research, I saw many people just going to Busan on a day trip so I thought I’ll put this up to share the places we visited in Busan!

This is an itinerary based on my recent trip to Busan.

Travelling to Busan from Seoul
We traveled to Busan from Seoul via the high-speed train – the KTX. The ride was comfortable and it was easy to book the tickets online (tickets were sent via email so you don’t have to queue to collect it at the counter after that).

Here’s where it got a bit different – all you have to do after arriving before your train departs, is to wait until about 30 minutes before your train is scheduled to depart before the information on which track to go to appears on the screen. (I internally panicked when I did not see our train number on the screen when we arrived about 1 hour before the departure time.)

No one will check your ticket as well – it is all quite “self-service”. Look for your train car and then your seat number.

On the KTX to Busan

Day 1: Harry Potter themed cafe, Bay 101, Gwangbokdong Food Street (광복동 먹자골목)

We checked in at our stay upon arriving in Busan via the KTX (we took the 12.30pm train and arrived at 3.07pm).

We stayed at Citadines Haeundae Busan which was about an hour’s subway/MRT ride from the KTX station at Busan to Haeundae (transfer at Seomyeon Station to Line 2).
The reason why we decided to stay at Haeundae is because it’s near the famous Haeundae beach and we were hoping to get a sea view (which we did!)

After settling in, we had a quick bite and then left to visit a Harry Potter themed cafe that my colleague told me about a few days before we flew to South Korea (we started from Seoul).

PO TID 포티드
Address: 22 Jungang-daero 680beon-gil, Bujeon 2(i)-dong, Busanjin-gu, Busan, South Korea
Operating Hours: 11:30am – 10:30pm daily

We traveled about 40 minutes from Haeundae to get there. The cafe is located at a university kind of neighbourhood so there weren’t much tourists there and a lot of students.

Initially we weren’t even sure if the cafe was opened as they had curtains drawn and you couldn’t look in. So we just tried and opened the door and was quite amazed upon stepping in.

PO TID Busan from the outside

It took our eyes a few seconds to adjust to the darkness but it was decorated nicely and it made you feel like you’ve stepped into the Leaky Cauldron. You order your food via a screen and everything was in Korean but we asked the staff for assistance and they kindly assisted us with it. Once your number is called, you can collect your food thereafter.

As it was a cafe, the food they serve were mainly cakes and cookies as well as a variety of drinks.
I got the Hibiscus tea and Eugene got a latte.

We spent some time admiring the interior – it is slightly different from what we saw from blogs but if you are there, do check out the shelves of potions (towards the washrooms) and the dementor hiding at the back near the fireplace with green floo powder.

After that, we hung out at a park (along the junction of Jeonpo-daero 209 beon-gil and Dongcheolro) and people watched a while.

The Bay 101
Address: 52, Dongbaek-ro, Haeundae-gu, Busan
Took the train from Seomyeon back to Haeundae and went in search for The Bay 101! I’ve always seen it on TV and that’s the iconic landmark in Haeundae so I was quite excited. The streets were pretty quiet other than the locals on their evening walk and it made me like Busan/Haeundae at that point.

When we’d reached The Bay 101, it was apparent that that’s a popular tourist site, with many tour buses parked at the carpark. And there we saw it – the tall buildings that make up the skyline of The Bay.

It reminded me of Singapore’s CBD, but the buildings were a mix of commercial and residential buildings (Singapore’s CBD are all commercial buildings). The river is also much wider than Singapore River.

There’s a small mall where there were loads of eateries but we decided not to eat there due to the crowd and went to look for Gwangbokdong Food Street (광복동 먹자골목) instead.

Gwangbokdong Food Street (광복동 먹자골목)
Address: Gwangbok-dong, Jung-gu, Busan, South Korea
After about a 20mins walk, we arrived at Gwangbokdong Food Street (광복동 먹자골목). It was a bit overwhelming and we couldn’t decide where to eat.

Sidetrack: we wanted to eat Kyochon chicken but realised that the place near where we are staying closed earlier than their stated time. So we had a change of plans.

We ended up at a random eatery and ordered their abalone porridge which unfortunately was quite plain and expensive. But at least we got some abalone and their banchan was not bad.

We bought some snacks back to our room after that for some supper!

We found another street in Haeundae with better food on our 3rd day and I’ll share with you in the post about our 3rd day there. 🙂

Busan Day 1 Places of Interests Address
PO TID 포티드 22 Jungang-daero 680beon-gil, Bujeon 2(i)-dong, Busanjin-gu, Busan, South Korea
The Bay 101 더베이101 52, Dongbaek-ro, Haeundae-gu, Busan
Gwangbokdong Food Street (광복동 먹자골목) Gwangbok-dong, Jung-gu, Busan, South Korea
Continue Reading

Some childhood memories of toys – Sewing Machine

I have a few drafts in my dashboard, but oftentimes I want them to be perfect. Which takes a lot of time and then I give up writing and editing. Which explains my MIA from here for more than a year. 🙁

When doing prayers, sometimes some little snippets from my childhood come to me and I feel emotions from then. This is when I feel it’s probably time for me to offload it here.

At the moment I have a dress which zipper is rather loose, causing it to be difficult to zip up. I’d fixed it once by sewing but the threads came off again.

I suddenly got to the memory where I once (maybe 10 years ago?) felt and thought that each household should have a sewing machine. And that memory of a small white sewing machine flashed into my head, and then a small pink one that I once owned for a few hours or days.

My dad was the only person working in the past, which made growing up not so fun for us as we were always told to study hard so that we can earn more money in future.

As a kid, we couldn’t understand this and was upset when we saw our friends or other kids owning various toys.

Well, one toy that somehow caught my attention was this miniature sewing machine.

I can’t remember the brand now, and the exact name of it, but I recalled that it had lights, and it functions like a real sewing machine.

As a kid, I saw my mum sew and use her sewing machine and I wanted to sew as well. It so happened that this sewing machine was advertised to be fun for little girls so I really wanted one badly.

I can’t remember how much it was then. Was it like $20? It was a huge sum of money for us then (and for my poor parents who had to send us to school and also survive) but I somehow managed to make noise about it and convinced them to get one for me.

Guess what though? We didn’t know how to use it, and my mum tried by reading the instructions and still couldn’t get it to function.

I remembered being so confused – disappointed, angry, upset about the whole situation. I got what I wanted, but it was faulty, and wasted my parents money. That was the worst feeling ever for a little kid.

I was so upset then about myself and my stupid decision in wanting a fake sewing machine that I took whatever decision my mum made about it – to return it back to the store.

That was the end of me owning my sewing machine.

I somehow recalled looking at it for a the next few days before my mum returned it and still hoping that someday I will own a real one instead.

But now that I am here and able to afford a real one, I don’t see a need for it anymore, and prefer sewing with a needle instead.

Think I might continue with this series of little stories. 😊

Continue Reading

HDB BTO Process

Written in 2015 🙂
I wanted to write something really comprehensive, but I think the information that most people want to know should be present here most importantly.

Here’s the steps and process that we went through so far after we got our queue number:
Selection of Flat
1) Look at all the available maps and plans on the map and make a few choices before you go.
2) Keep track of

Basically, we went to pay for our HDB 5% down payment yesterday, and as much as I can remember, here is what to expect:
1) Prepare your documents as per the letter before you go – especially the decision about being Joint Tenants, or Tenants-in-common.
2) When you are there, the officer will check your IDs, then go through all the documents required. You’ll just basically understand them and sign.

The thing here I would say, is to read through as much as you can on HDB’s website. It’s quite comprehensive. Since you’re spending so much money (albeit from CPF, it’s still money that you earned), might as well just do it properly. 😛

Continue Reading

A Better Florist: Flower Arrangement Workshop Review

The workshop I attended was provided by A Better Florist.

Who doesn’t love flowers?

I love them but have never felt that I was “artsy” enough to arrange a bouquet. The closest thing I did was the bridesmaid bouquet for Audrey’s wedding last year but even so, I had no idea what I was doing (we only used baby’s breath).

When I heard about the opportunity to attend A Better Florist‘s Flower Arrangement Workshop on 11 Nov, I jumped at the chance to learn something new. My mum had attended quite a few flower arrangement courses and came back with many beautiful flowers arranged so nicely.

The workshop was conducted by Shirleen, a very nice and bubbly girl. After a round of introductions, we learnt about the flowers and leaves that we were going to use for the day. We were introduced to Forget-me-nots, Eustomas as filler flowers (flowers that fill up the space) as well as some leaves to make up a bouquet. The focal flowers that we were using were roses and carnations.

A Better Florist workshop

The style that we were taught was a nice layered style that is the trend now for Instagram or photography (I never really thought of the difference when I saw bouquets).

After demonstrating the first few steps, Shirleen left us to picking our own flowers and arranging them. I won’t go into too much details (do sign up for the workshop to learn!), but I really had fun picking my own flowers and arranging them! Shirleen walked around assisting us and giving us tips when she noticed anything that we should take note of. One thing I learnt was also that tape is a florist’s best friend!


A whole lot of flowers to pick and design your own bouquet!

Once the basic arrangement was done, we were taught how to keep the flowers alive and to wrap them up nicely with a burlap to give it a nice rustic feel and for a finished product!

Very proud of my completed bouquet here!

All in all, I had a great 2 hours learning how to arrange a bouquet of flowers and the technical stuff behind it. Everything was simplified in a way that would make you want to go out and buy a bunch of flowers to arrange them again! I can’t believe that I’d arranged a bouquet of flowers within 2 hours and will definitely be something that I would want to do again.

Thank you A Better Florist!

If you would like to attend A Better Florist‘s workshop, do keep a lookout at their workshop page here.

Continue Reading

I’m Married!

Yess finally! Haha
Finally because we started working on our wedding almost a year ago, and finally everything is done.
Despite us looking forward to this day for so long, it still feels better to have something plan being executed after thinking or working on it for so long.

I won’t go into too much detail, but thought I’ll log down our/my general thought process so that I can look back at it in future and/or hopefully it’ll help others.

The other thing I want to say is that, both our parents are pretty liberal in letting us plan the wedding. So all we did was update them with the progress.

We spent a total of less than $25k for the wedding + photoshoot. I won’t list the individual costs here as the quotes given by the vendor might be different depending on your requirements (which wouldn’t be fair for them if I listed their prices here). I would say these are value for money vendors – meaning they are professional and very nice vendors but not well known enough to charge very high costs, so do check out their portfolio and work with them if you find that you like their work.

What we wanted our wedding to be like
I’ve always wanted a simple and small wedding. BUT, not too small until there are only relatives, but one where friends that I want to invite can also come.

The thing is, this gave us a problem where the wedding wouldn’t be very very small. We ended up having a wedding with around 200 pax mainly because of the venue’s minimum number.

Venue
This was a difficult part – we started our wedding planning with this.

We started by looking at restaurants coz of our budget, but the thing is, we aren’t sure which restaurants are good.

We ended up going to a wedding fair at Vivo’s atrium in Jan 2016 (where we were hounded by some photography shop staff for quite a while), and noticed Orchid Country Club’s booth with their promotion.

The staff weren’t pushy, and the promotional package seem to cover almost everything that we need (other than food and venue – free flow alcohol, decorations, ang bao box, free guestbook, free room stay).

We didn’t sign on the spot but decided to think it through.
After thinking about it, we chose a wedding lunch to keep the wedding simple.

The benefits of a wedding lunch are:
1) It finishes fast – guests can go elsewhere or run errands after that.
2) If you’re doing gatecrashing, you don’t have to wait so long for the banquet.
3) They don’t usually rush the food, and guests don’t have to worry about transport.
4) It is cheaper.

We chose buffet, mainly because we didn’t want the lunch to drag too long. We love weddings that are short and sweet (I think the guests too).

Pre-wedding shoot
Our friends usually have their pre-wedding shoot near the wedding, but we decided to have our pre-wedding shoot earlier as it’s usually something major before the wedding.

This was our to do list:
1) Photographer – we choose a freelance photographer recommended by a friend, mainly because the price fit our budget and the photographer’s portfolio was pretty good.

We worked with Ivan from LightSmith LLP, and I say he exceeded our expectations.

2) Dress – In photos, as long as something looks decent, you don’t need to spend too much money on it. I spent S$100 on a dress from this shop on Qoo10. It exceeded my expectations and all I had to do was to bring to a tailor to edit it (she charged me $5 only).

3) Location – I wanted something outdoors as I didn’t like the indoor decorations and stuff. I saw some pictures of Coney Island and I suggested that.

4) Makeup – Ivan (our photographer) recommend using this app called Vanitee to look for a makeup artist. I didn’t like his recommended ones but ended up finding this makeup artist Mint Gooi from Casaminto. You can find her portfolio here: Casaminto Makeup.

Mint was very professional and friendly and she knows her stuff. That’s the most important thing. I had spoken to another makeup artist prior to her and the other lady told me that she could do the makeup at Coney Island in the morning. Mint told me that she won’t be able to do it as there won’t be any electricity for the hair curling irons which was true.

We took the pictures in March 2016.

Wedding Dress
My thought process was this: People won’t remember what you wear a year later. Believe me, I don’t remember most of my friend’s weddings except roughly the people I sat with. Ended up buying another dress from the same Qoo10 shop. This was slightly expensive ($125), and I bought the wrong size the first time – do leave me a comment if you would like to purchase the unworn dress from me.

Justice of Peace (JOP)
We wanted to go for a lady JOP, and I let Eugene do the contacting. He did it quite last minute (and I mean 4 months before the wedding), so we didn’t get our first choice. I felt that this was a blessing in disguise however, as our JOP that we got on the actual day was Mr Mike Tam Chee Wah. He has a good sense of humour which our guests all commented that he was a good JOP and some of them have actually asked for his contact details. He was also very nice and gave us advice on what to do. We had originally only wanted one march in (after our solemnization), but seeing that there were many guests already there, he suggested that we have a march in before our solemnization which I felt was a nice touch to our wedding. We highly recommend him as your first choice if you’re looking for a solemnizer.

Brothers and Sisters
We kept it simple and asked 3 of our closest friends (in my case, my sister and Eugene’s sister plus one of my good friend who have been there for me for years – Meow Ling), to help us.

There wasn’t any gatecrash so it was even easier.

I remember Eugene’s brothers asking what to wear on the actual day and I told them it’s up to them, which made them super happy lol.

Program on actual day
This was done up with reference to a few other files that we found online as well as our own experience at weddings and how we wanted it to be like.

We kept it simple since there wasn’t any changing of dress – only one march in, video montage as well as speech and toast.

Photographer/Makeup
We kept to working with Ivan on the actual day as his price was reasonable and his professionalism was there.
Same goes for Mint!

Deco/wedding favours
This was part of the wedding package with Orchid Country Club, so all we did was to make decisions and choose.
We chose espresso mugs as well as passport holders. Interestingly the passport holders were the more popular ones!

Photobooth
I’d worked with Happy Gorillas on one occasion and had used their photobooth at a friend’s wedding.
The good thing about their photobooth is that the pictures are not small. I understand having credit card sized pictures, but they’re so small that I can barely see the pictures properly. And if you see how people keep the photos, if they’re big enough, they will put it on display at their home, their desks etc.
Value for money prices as well and they allowed for customization of the frame!

Live band
Lastly, live band for the guests!
If you’ve been to buffet weddings, you’ll know that they are boring. People eat at most 2 rounds and they get bored and sit around doing nothing. Hence, we decided to hire a live band to entertain the guests.

We booked Jeremy and Sky from Merry Bees (they work with a few other companies as well I believe) and topped up for Jeremy to be the Emcee as well. I was very worried about how it would go on the actual day (because I saw a friend’s emcee that he booked from a vendor screwing up his whole wedding) but his professionalism was just amazing!! I needn’t worry at all. His singing was also very good and a lot of friends raved about the band after the wedding!

We almost wanted to confirm with another vendor with regards to booking someone else for the band, but they turned out to be super unprofessional and we gave up trying after a month trying to confirm with them. Do comment with your email address and I’ll let you know which vendor.

Will update with pictures once they are sent over!

*Note: we gave various amounts of Ang baos to our vendors, JOP, brothers and sisters as well.

Would like to thank all the vendors and everyone who helped out at our wedding (25 Feb 2017)!
Continue Reading
1 2 3 18